It’s a breeze to record screen on Mac once you know the ropes. But when it comes to stopping screen recording, things can get unexpectedly confusing, especially for those who are new to macOS or unfamiliar with its built-in utilities.
Fortunately, macOS provides multiple recording options, and each method comes with its own specific approach to ending the recording. Whether you’re using the Screenshot Toolbar, QuickTime Player, or professional third-party tools like OBS Studio, the steps to stop recording can vary more than you might expect.
In this article, we’ll break down the four most common and reliable methods to stop screen recording on your Mac. Whether you’re a casual user or a content creator, you’ll find practical, no-fuss solutions to regain control of your recording—quickly and confidently.
Method 1: Using the macOS Built-in Screenshot Toolbar (Shift + Command + 5)
If you’re using macOS Mojave (10.14) or later, you can access the screenshot and screen recording toolbar by pressing Shift + Command + 5. To end recording, you simply click the red [●] button in the menu bar at the top-right of your screen.
After stopping, the recorded video is typically saved to your desktop, where you can preview or edit it immediately.
Tip: If the menu bar is hidden during recording, move your mouse to the top of the screen to reveal it, or press Shift + Command + 5 again to bring up the toolbar.
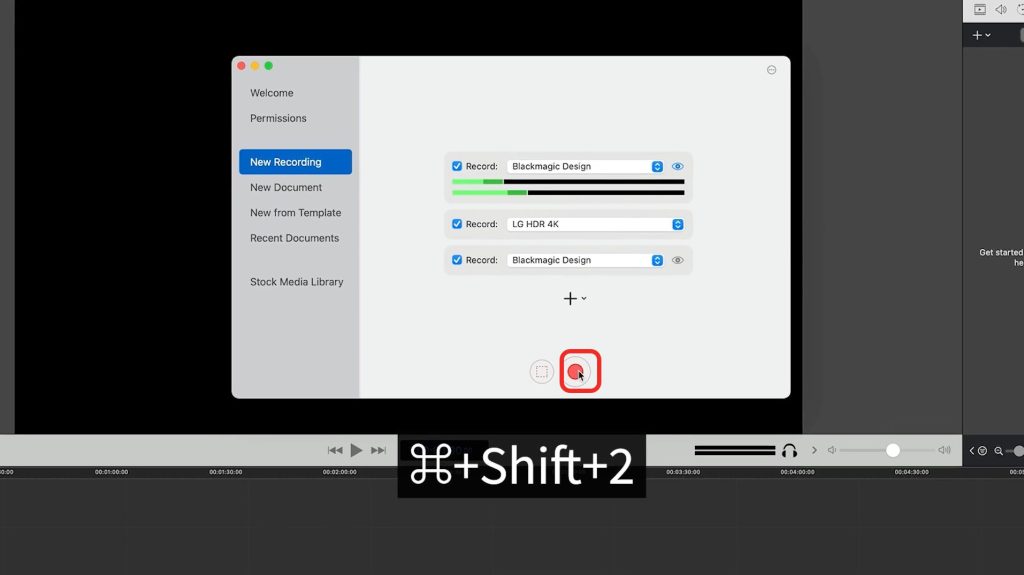
Method 2: Stop Screen Recording Using QuickTime Player
QuickTime Player isn’t just a media player—it’s also a trusted screen recording tool that comes pre-installed on every Mac. It’s especially useful for those who want more control over their recordings, like capturing a specific window or including voice narration through a microphone. To stop a QuickTime screen recording, all you need to do is click the stop button in the upper-right corner of your screen.
Once stopped, QuickTime will automatically prompt you with a save dialog to choose the file name and destination.
Tip: This method is best for users who want to record a specific window or include microphone audio.
Method 3: Use Keyboard Shortcut to Stop Recording Instantly
Need to stop a screen recording in a split second? Your macOS computer has you covered with a built-in keyboard shortcut—perfect for when you need to end a session quickly without clicking through menus or searching for buttons. To stop screen recording instantly, tap Command (⌘) + Control (⌃) + Esc
Pressing this key combination will immediately stop the active screen recording initiated via macOS’s native Screenshot Toolbar (Shift + Command + 5).
Important Note:
This shortcut only works with macOS’s built-in screen recording tool. It does not stop recordings in QuickTime Player or third-party applications like OBS Studio or ScreenFlow.
Whether you’re in the middle of a presentation or capturing something on the fly, this shortcut offers a quick exit—no mouse required.
Method 4: Stop Recording with Third-Party Tools (e.g., OBS, ScreenFlow)
If you’re using professional-grade screen recording software like OBS Studio, ScreenFlow, or Camtasia, the method to stop a recording depends entirely on the tool you’re using. Each has its own interface and workflow, so it’s important to know where the stop controls are located.
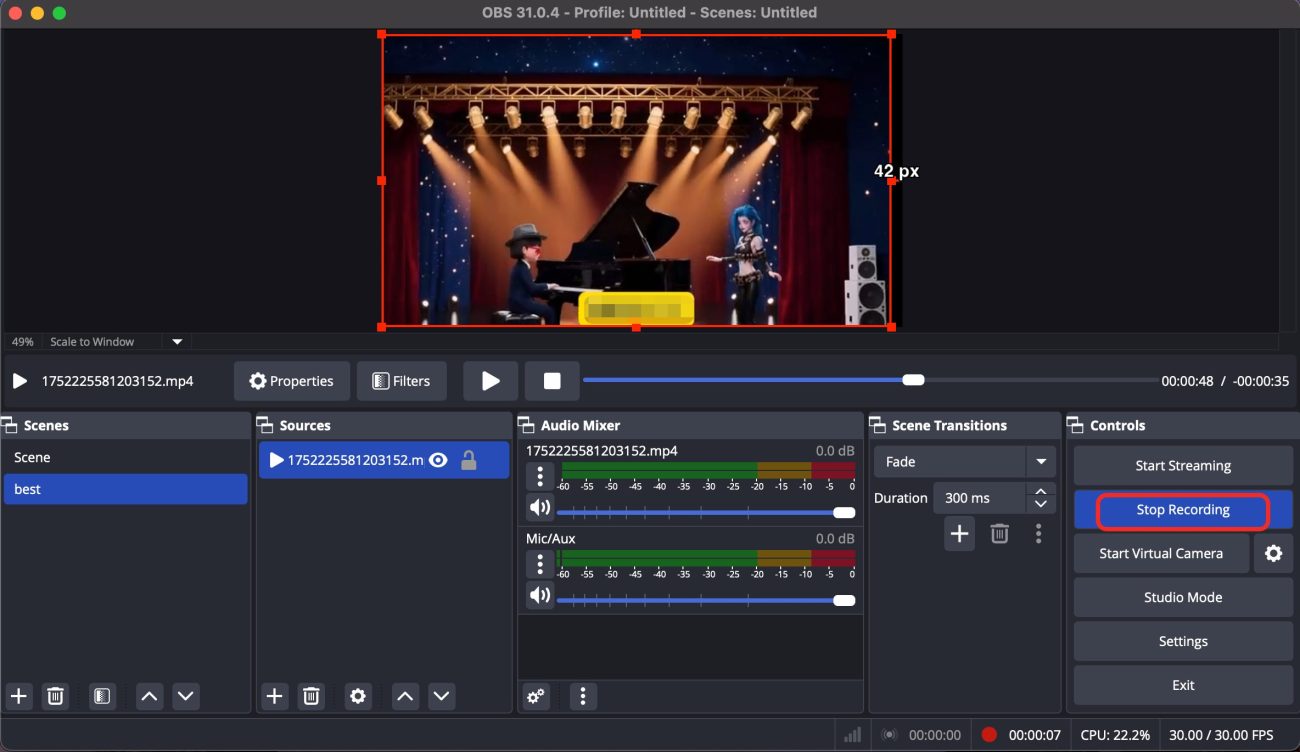
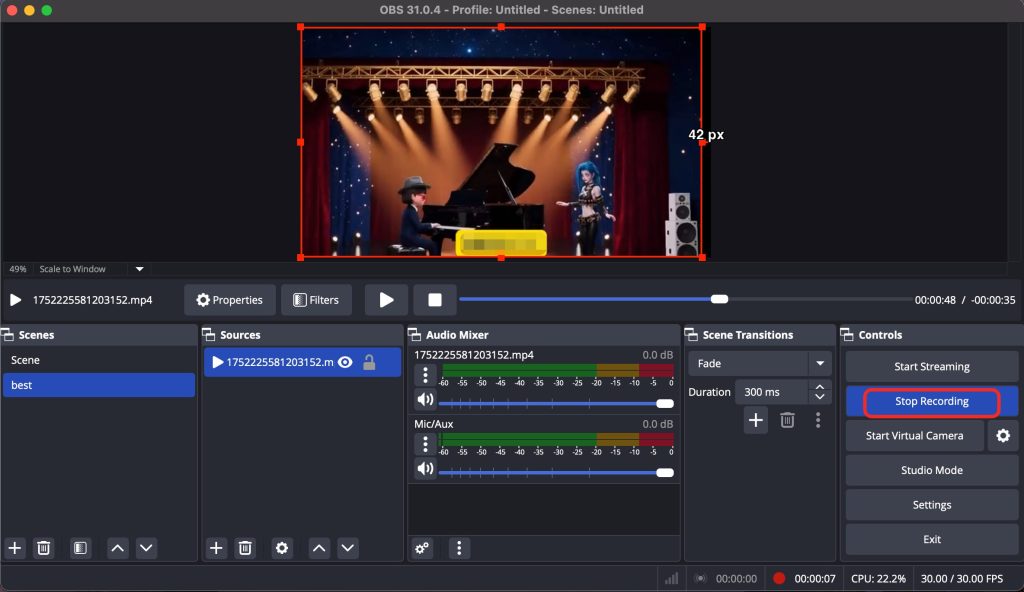
How to Stop Screen Recording in OBS Studio:
-
In the main OBS window, navigate to the bottom-right corner and click Stop Recording.
-
The recording will be automatically saved to your default file location, which you can customize in the Settings > Output > Recording Path menu.
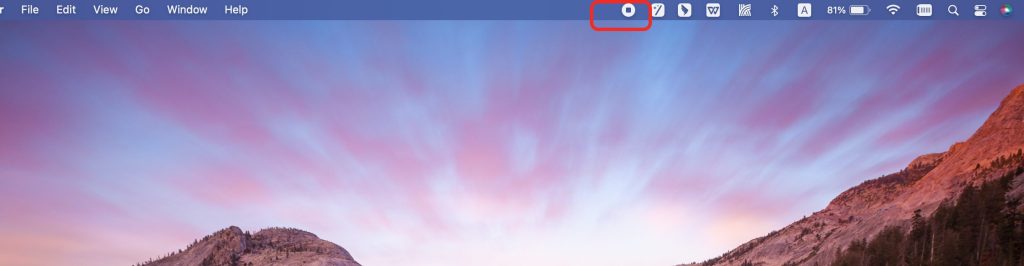
How to Stop Recording in ScreenFlow:
-
Look for the ScreenFlow icon in the top macOS menu bar.
-
Click the icon and select Stop Record from the dropdown.
-
Once stopped, ScreenFlow will immediately open the editing interface, allowing you to review and refine your recording.
Pro Tip:
Before starting any screen recording with third-party tools, take a few minutes to explore the software’s settings. This helps you avoid common pitfalls like recordings not saving properly, or audio not being captured as expected.
Whether you’re a content creator, educator, or remote worker, mastering your third-party software’s controls will ensure a smoother, more professional recording experience.
FAQ: What If the Stop Button Disappears During Recording?
Occasionally, the Stop button may not appear as expected, or the recording app may freeze or become unresponsive. Don’t panic—here are a few effective troubleshooting steps:
1. Force Quit the App
Press Command (⌘) + Option (⌥) + Esc to open the Force Quit window.
Select the recording application from the list and click Force Quit.
2. Restart Your Mac
Sometimes, a quick reboot is all it takes to resolve temporary glitches and restore functionality.
3. Check Your Disk Space
Low storage can prevent your system from saving the recording properly. Make sure you have enough free space before and during recording sessions.
Caution:
Force quitting an app may result in the loss of unsaved recordings, so use this method only if other options fail.
Tip: If you frequently experience this issue, consider updating your macOS or the recording app to the latest version, as software updates often fix bugs and improve performance.
Where Are Screen Recordings Saved?
By default, macOS saves screen recordings to the Desktop. The files are usually named “Screen Recording” followed by the date and time. You can change the default save location by opening the screen recording toolbar with Shift + Command + 5, clicking Options, and selecting a new save destination.
Final Thoughts
Whether you’re using macOS’s native screen recording capabilities or more sophisticated third-party software, the ability to end recordings smoothly and deliberately is just as vital as starting them. It often marks the difference between a flawless capture and a frustrating retake.
Mastering keyboard shortcuts, menu bar commands, and app-specific controls not only streamlines your workflow but also significantly enhances your efficiency—particularly if screen recording is integral to your professional routine, such as virtual presentations, instructional content, digital tutorials, or online education.
If recording is a regular part of your day-to-day tasks, it’s worthwhile to explore and evaluate different tools. Each platform offers unique functionalities, and identifying the one that best complements your working style can elevate both your productivity and the quality of your deliverables.
With the right techniques and tools at your disposal, you’ll be equipped to record with precision and conclude with confidence—every single time.